Banh mi – the actual baguette is my idea of eating heaven. It is light and fluffy on the inside and crispy on the outside. The crust is golden and thin, it makes an irresistible crackling noise when its held and then bitten. French baguettes will do if you can make your own banh mi but it is not the same perfection. The Vietnamese baguettes (inspired by the French) brings so much joy to the bite once it is filled with different textures and flavours of meat, herbs, vegetables, spice and seasoning. It is the perfect sandwich in taste, in size and lightness. It is heavenly and if you can only eat these once in a while, most remain in your culinary memory forever. It is also great with just a spread of butter, or pate. Traditionally it is great to eat with curries or beef stews.
Someone on Instagram asked me to help them make these baguettes to help their business during the time of coronavirus. As it is also something I want to learn, I said I would help. After researching and viewing a few Vietnamese youtube videos on how to make banh mi, I decided
Diễm Nauy was going to help me make the best and most authentic banh mi. Click on her name if you can understand Vietnamese to see her video.
This is wholly her technique/ recipe, except I have translated and adapted it to a readable recipe here in the most concise and simplest way that I can so that we can all keep this, learn it by heart and make happy and enjoy the delights of the truly amazing Vietnamese banh mi-s. In time of writing, I have made this twice.
I have previously made banh mi and failed in the past, probably 8 years ago, from a couple of recipes in cook books. I am really pleased now that I have found something that works. My cousin in California whose a trained chef has also made these with a few tweaks and it came out delightfully too.
Please note that it takes time to make these and that it is best to just follow the recipe as precisely as you can to achieve the best results. On your second batch, I recommend making double, give away, freeze, eat… 6 just isn’t enough!
I will list the method and ingredients in stages to make life easier. More pictures will come at the end.
Equipment needed
Weighing scales
Medium sized bowl with cover
Free standing mixer with dough hook- if you don’t have, a large bowl and your hands will do
A rolling pin
2 tea towels
2 glasses or rice bowls
A kettle
1 baking tray that can hold a little water
A baking rack that fits the oven or a French baguette tray
3 tins or cans of unopened canned food.
A piece of baking paper that fits the rack
Scissors or a hole puncher
A sharp knife to score
Water sprayer
A timer
Advance note:
Please know how long it takes your oven to heat up to 240c fan. Mine takes 7 mins. If you know this, you will save a lot of time and energy.
STAGE ONE:
Starter
Make starter overnight to be ready for the morning, it needs to sit for 8-10 hrs at room temperature. It will then take about 4-5 hours to complete the process so if you want them for lunch, do the maths.
Ingredients
Starter
150g strong white flour or anything with protein content between 11 – 13%
half tsp salt
2g instant yeast
90g cold water
Method
- Mix together and knead for about 2 mins. Cover in a large Tupperware box for 8-10 hrs at room temperature or 24hrs in the fridge. If it has been in a fridge, leave at room temperature for at least an hour before you want to use it.
STAGE TWO:
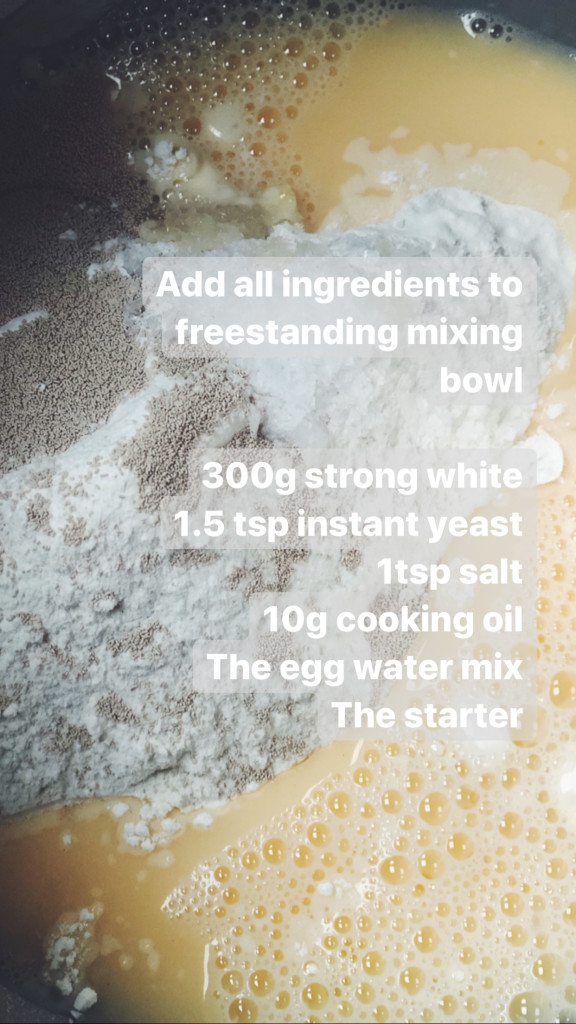
Combine ingredients
You need strong white flour or anything with protein content between 11 – 13% (so you can use plain flour but I’ve not tested that, Diem Nauy has used plain in her video)
Ingredients
Makes 6 baguettes
300g strong white flour + a little for dusting
1.5 tsp instant yeast (or the rest of the sachet if your yeast comes in those)
1 tsp heaped sea salt (I used Maldon, be careful table salt might be saltier)
1 tbsp / 10g cooking oil
1 egg + cold water to make up 190g in total, mixed.
The starter you made previously.
Method
- Place all the ingredients in the free standing mixing bowl with a dough hook and knead on the lowest setting for 15 mins.
If you don’t have a mixer, please try with your hands and combine until you get a very smooth and elastic dough. It should still be wet and sticky, try to only use a little flour for dusting.
2. Oil the bowl lightly, place the dough inside, cover and place in the oven with 300ml of boiling water for 75 mins.
I leave a note on the oven door to tell everyone not to open the oven to maintain the warm humidity inside.
STAGE THREE:
Shaping
- Place a clean tea towel on a baking tray, lightly dust with flour then make three one inch increments leaving 5cm of space apart for 6 doughs. You can use a few tins or cans at the bottom to stop the towel from falling out of place.
- After 75mins, the dough should have risen and at least doubled in size. Lightly dust a clean surface and roll the dough out into a square shape with your hands. Fold in all the corners until you have a ball, turn it upside down and keep shaping the dough into a round ball. Repeat. Twice is fine.
- As fast as you can, (so it doesn’t dry out) divide the dough into 2 and then each into 3, making 6 balls. Take each ball and stretch out into a square, folding in itself the corners then shape into a ball. Rest on the tea towel tray for 5 mins.
- After 5 mins, repeat the previous process and rest again for 5 mins.
- Lightly dust the rolling pin, after 5 mins is up, roll out a dough into a pear shape, small at the top and fat at the bottom then roll from the top down firmly with 3 fingers from each hand. Then continue to roll the dough into a long baguette shape with both hands giving more force on the ring and little finger to make pointy ends. Place onto the tea towel tray.
- Repeat with the other doughs.
- Cover the shaped doughs with a tea towel. Place in the oven with 2 glasses of boiling water to prove for 60 mins. Display your note so no one opens the oven.
- Get the next stage ready while you wait. (You can also make fillings and prep herbs and veg)
STAGE FOUR:
Baking
- If you don’t have a baguette tray, take a baking rack that fits the oven, measure out the same size baking paper, fold it into 1 inch folds and cut tiny triangle shapes along the paper on both edges, 1 inch apart. If you have a hole puncher, this will be easier and quicker. This is so that the steam can distribute evenly later on. Fold it out and lay the paper on the baking rack.
- Place a tray that can hold water at the bottom of the oven.
- After 60 mins, take the proved dough out of the oven. Take the glasses out too.
- Heat the oven to 240c (don’t forget!)
- Carefully place the doughs gently on the paper on the rack. They will feel irresistibly soft and pillowy, like clouds.
- Spray with water and immediately, with a sharp knife, slit the baguette lengthways at a 45 degree angle, half centimetre deep all the way.
- With hope, your oven is ready, turn the heat down to 230c
- Fill the bottom tray with 200ml of boiling water – this is the right amount of water and steam it needs
- Bake it immediately, it needs 18 mins altogether but stand with a water spray and spray it evenly every 5 minutes.
- After 18 mins total cooking time, the baguettes are done. Take it out.
- It should be golden. Leave to cool for 10 mins.
- Slit the waist lengthways and fill it up with all your desires.
Banh mi will go stale quite quickly. Eat them up as soon as you bake them or I keep them in an airtight container overnight and re bake for a few minutes in a hot oven to get it fresh again. I have also been told they freeze well.
If you can’t make the baguettes just buy regular French baguettes.
There are a couple of other filling recipes in my book My Vietnamese Kitchen which you can buy directly from me
hereHere are the picture references to help along the way. It would be great to see your baking! Please post and tag me on your social media posts
@loveleluu